Getting my fashion brain back into gear..

Getting my fashion brain back into gear..


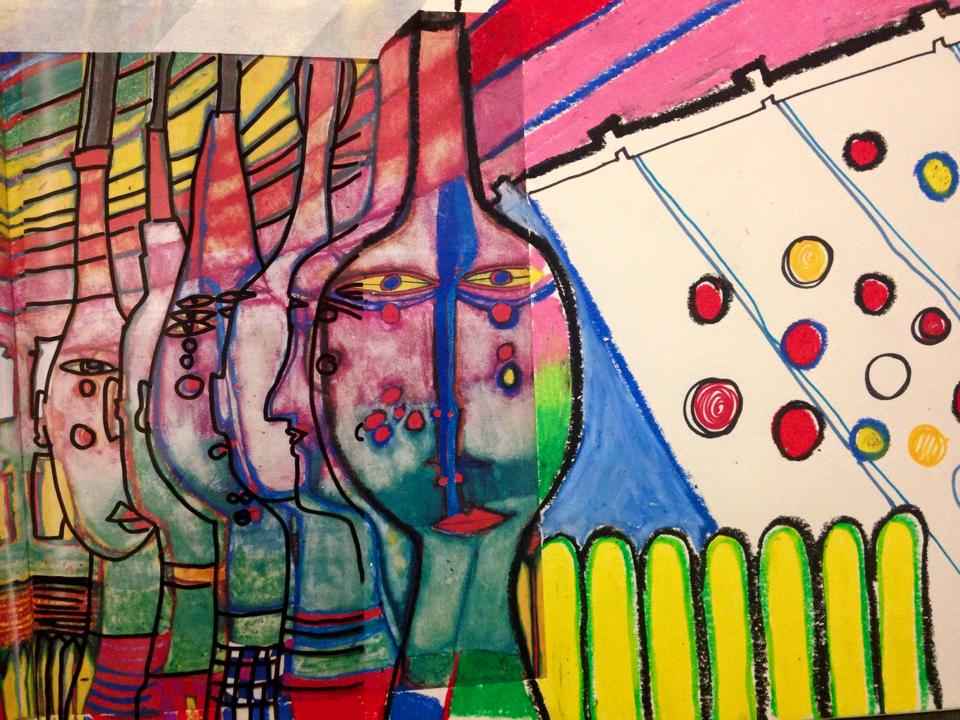
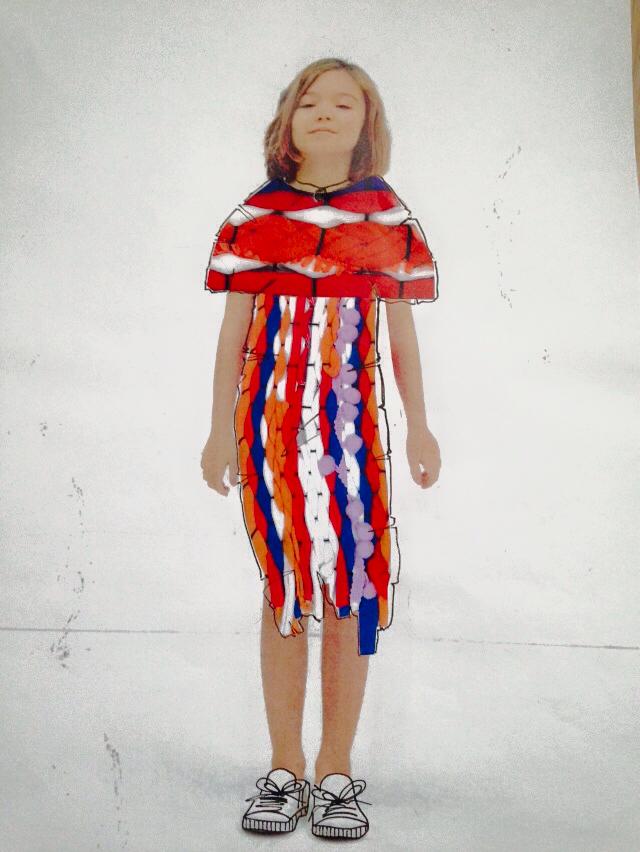
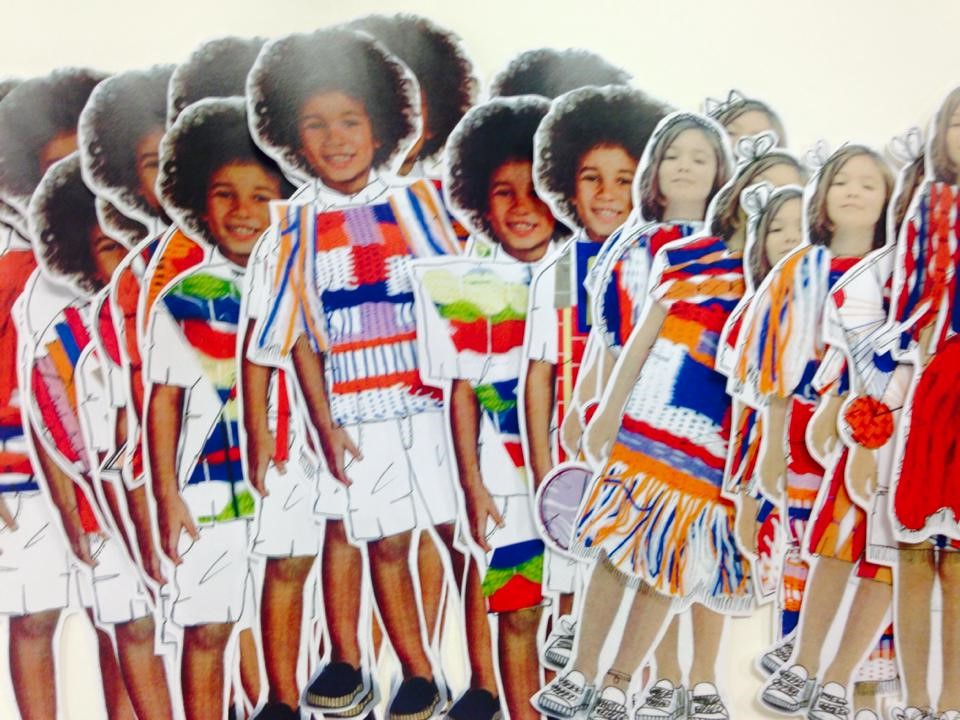
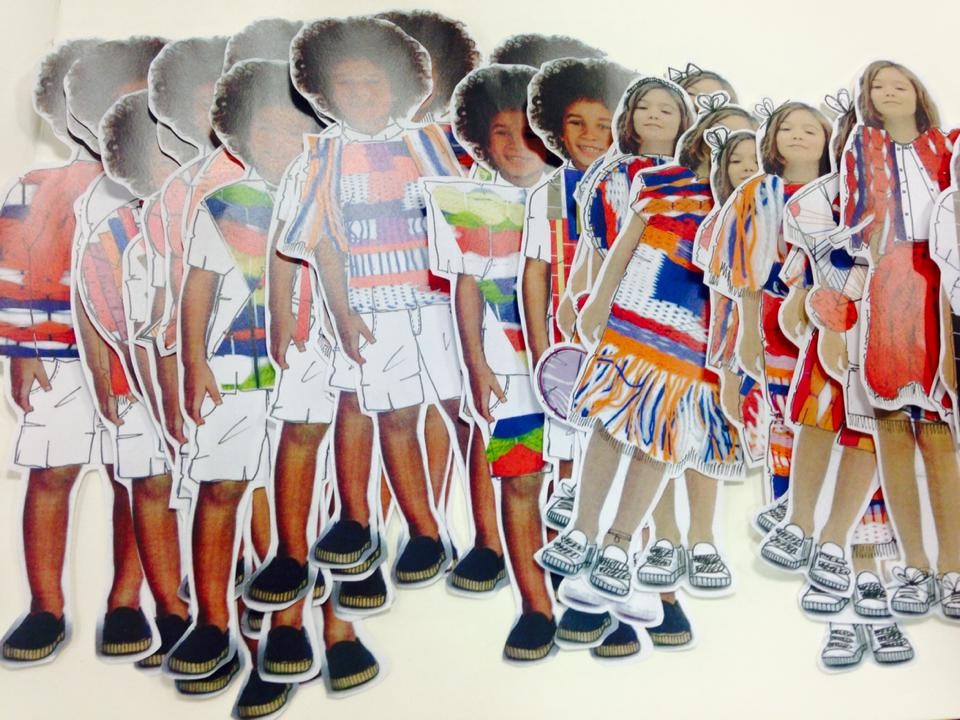
Today was all about creating fashion collages using photocopies of samples and my sketchbook work, enlarging and reducing the size of them and putting them on a fashion figure to create ideas for garments. At first I wasn’t too sure on the idea as normally I just put a pen to paper and start designing, but I wanted to get inspiration from this to see how much it helps. After a few initial attempts, my brain got into gear and loved creating these collages. Usually I just design and make for boys but this project I wanted to see if I could create a unisex garment so I decided to design for girls and boys to see what I could create.

Here are just a few of my outcomes, I managed to successfully make 15 girls and 15 boys fashion collages.


10409632_10152683580802273_5796126164747804195_n1488079_10152683580607273_8891635475035766126_n 11009996_10152683580697273_4234115803838074839_n11018083_10152683580492273_7262245915015441943_n

11021977_10152683580907273_5869438213496479815_n


11146216_10152683573377273_8411988305357797659_n11143127_10152683573522273_6021748710530175370_n


Now it’s time to create a template and start designing from these!

Four weeks to go!


Still getting my weave on..

Still getting my weave on..


The second week of the Easter holidays was all about samples, creating weave samples using wool and PVC seeing what patterns and textures I could create. After creating and choosing a colour palette which consists of white, red, blue, lilac and orange I then started weaving, getting inspiration from my sketchbook. Here are the samples that I created, choosing a different pattern each sample.


11164624_10152683573807273_2007088557038606691_n 11136672_10152683573872273_2283431513296004966_n 11108844_10152683574372273_4643390756884094053_n 11053646_10152683573682273_6694113087116353473_n 10471192_10152683573927273_4857113159254834687_n 10404313_10152683574512273_3677615945873469110_n 1743515_10152683573732273_1306144026957934070_n 942602_10152683573612273_5843604074517769383_n


 Out of the samples that I have created I really like the ones with the triangle and squares created into the weave, using the different colours it makes it eye catching and quirky. One of the samples I created I used a pop of lime green to see the contrast, and it actually really appeals to me. It makes the sample more striking and unique and creates a perfect contrast between colours. The one factor I need to decide on, is what colour yarn I want to use for the warp of the weave, as the different colour yarn really pops out, but then I don’t know whether it might be too much, as the black yarn neutralises it a little bit.

Even more decisions to make!

Final samples are the next step once these have been solved..


Progress progress progress..

Progress progress progress..


Over the past couple of weeks I’ve been manically stressing about my sketchbook, as normally I’m so organised and I know what is going on every page, but this term our sketchbooks have to be more textiles based. That thought really scares me, but with a lot researching into layout and designs, I started it. Two weeks late but I’m on the right track now (fingers crossed anyway). So here are a few progress photos of my work.


14 13


12 11


109


87


65


43


21


Now it’s time to develop my sketchbook even further and start producing more textile samples!

Here’s what happened..

Here’s what happened..

As I said in my blog yesterday I would show my results from the dye room, and here are they are. The first two images showing experimentation with applying heat to the puff binder in two different forms, steaming and the heat gun.


11062327_10152632161427273_4535606896224123673_n11043182_10152632161337273_7783180669692409335_n


The next few images are the screen printing with puff binder with a selection of different colours, unfortunately when I applied heat using the heat gun to the cotton I was using it crinkled up, but with steam this can be prevented.

 1947980_10152632161242273_5782209366011990310_n11082518_10152632161137273_5484893742509639237_n11081244_10152632160552273_563355214306184279_n 10984242_10152632160442273_2500913251505588291_n11046665_10152632160332273_2775147577433710427_n988506_10152632160792273_6094758211153758037_n10171754_10152632160612273_7230398939203911686_n


 And finally the next two images are screen printing with a special glue and then foiling on top, creating this cool metallic, rustic effect. With more glue, more foil will stick down, this will be my next experiment.

13418_10152632161017273_8282109940932959581_n 11080941_10152632160897273_68370873975196762_n


And now the group work begins..

And now the group work begins..


To start with this project was going to be all about being independent, but on Tuesday (10th March), Jenny put us into small groups. My group consisting of 4 other students which have also decided to do kid’s wear. To begin with being told to go into groups is quite terrifying, as everybody always works better alone, but after going through everybody’s research and seeing what ideas they had, it definitely opens up your mind about working in a group.

We all had quite similar research, primarily being colourful and print based with letters and words. So from a few of our images we produced a quick moodboard so we could all see what we had and how they linked. We had some materials we’ve bought or found that also linked and made it look more like a moodboard, rather than just printed images. After with the materials we had bought it we began creating small pieces that could go into the board. We melted stickers and pom poms onto bubble wrap, with the multi-coloured yarn to create abstract images.

So here are a few images to show this creative process and moodboard. Next step is to collate more images and experiments and create our final board.

1239371_10152611241002273_6782629632901875302_n 21710_10152611240817273_3145483867502857516_n11009222_10152611240892273_7363687385137689775_n


Where does my inspiration begin?

Where does my inspiration begin?


As I stated on the 4th of March Jenny gave us a list of her favourite things which consisted of artists, illustrators, furniture and architecture. Our task was to choose two or three of the topics as a starting point, the topics included:

– Memphis Design Group

– 1960’s/1970s hobby crafts

– Maske by Phyllis Galembo

– Brutalist Architecture

– Matisse Cut Outs

– Patrick Heron

– Cy Twombly

– Julie Verhoeven

– Bouchorouite Rugs

Out of the topics I chose to look at Matisse Cut Outs and Julie Verhoeven. After searching the library I found books on both topics.

The images below are from the book ‘Fat Bottomed Girls’ by Julie Verhoeven.

Frank Black – abstract plain

003


DR. Hook – when you are in love with a beautiful woman


006


FLEETWOOD MAC – you make loving fun

007


Luckily my older sister is an art teacher and also studied Art and Design at university. So went I traveled home at the weekend I raided her art book collection and found a small collection of Matisse Cut Outs postcards in which she had bought from his exhibition at the Tate Museum in London.

The following images are from this collection:

The Horse, the Rider and the Clown, Maquette for Plate V – Jazz  1943-4

008


Panel with Mask 1947

009


Design for Cover of exhibition catalogue ‘Henri Matisse’ 1951

010


 From these images I get great inspiration and can’t wait to start doing my sketchbook with them and making my own response to it. The colours and shapes can translate into print and the actual shape of the garment. Verhoeven’s images can translate into my own illustration style and adapt them to suit kid’s wear design.

Time to get cracking on my sketchbook!


Getting my brain into action.

Getting my brain into action.


After our unit briefing on Tuesday 3rd March, we were given loads of different materials to start to play around with. There were a variety of materials that including sequins, beads, straws, fabric, pom poms, the materials were endless. Our task was to just play around with them, to get us into the the right mind set, let everything go and just do it!

Personally I’m quite an organised person, so to start with it was quite daunting just putting random materials onto bonderweb and fabric, putting it under the heat press and seeing what happens. But after a few little experiments, my brain got into gear and didn’t think about the mess! It’s good to have days this, just letting your creative mind do its thing and to see what happens, and in the end you can get some really cool effects.

Here are a few of my experiments:

11041713_10152611240747273_4259204377076335960_n 10398662_10152611240667273_8124849642788029070_n 11038721_10152611240582273_8018814077432002259_n


The effects of the melted plastics and pom poms look really effective, and I can imagine if you took more time thinking of the composition, some really cool print designs could be make from these.

Overall a successful session, and now my brains on overdrive, thinking about what to do next!


PAQ-A-RAN zine Issue One

PAQ-A-RAN zine Issue One

Here is our PAQ-A-RAN zine issue one which is published on Issuu. After  many days of collating images and designs, it all came together and the outcome of the zine is the standard we wanted to achieve. It starts with who we are and what PAQ-A-RAN is, initial research, moving onto designs and collections, then showing the eight ways to change your basic jumper. Finishing off the zine with our app and social media.

ENJOY!


http://issuu.com/paqaran/docs/paq-a-ran_zine_8cd9ec8ea44dee

01_frontdesign


The Fashion Critical Path

The Fashion Critical Path

Today at uni our lecture was all about the path the fashion industry takes, from concept to shop floor. As a 2nd year fashion student this information is highly beneficial as we now already understand how the path is formed. It starts with trend analysis, shopping the world and attending trade shows. Trend and concept books are then made up from this information. This is the first development of styles for selection and discussion by the design and buying team.

The next step is sampling, which includes fabric sourcing, colour lap dips and trim sourcing, this results in the 1st view collection. This is the selection of range, factory negotiations and booking of production.

The final step is production and sales, which includes QC checking, CMT and shipping, this results in being on the shop floor. This is followed by sale analysis, best and worst products and store demographics etc.

A very helpful lecture that I will definitely take on board when heading into the industry.